| a_student_guide_to_using_flashcards_for_learning.pdf |
|
Flashcards are a very effective tool for helping students retain knowledge. This is a particularly useful strategy for history. Below is a student guide to using flashcards. This can be downloaded and printed. 
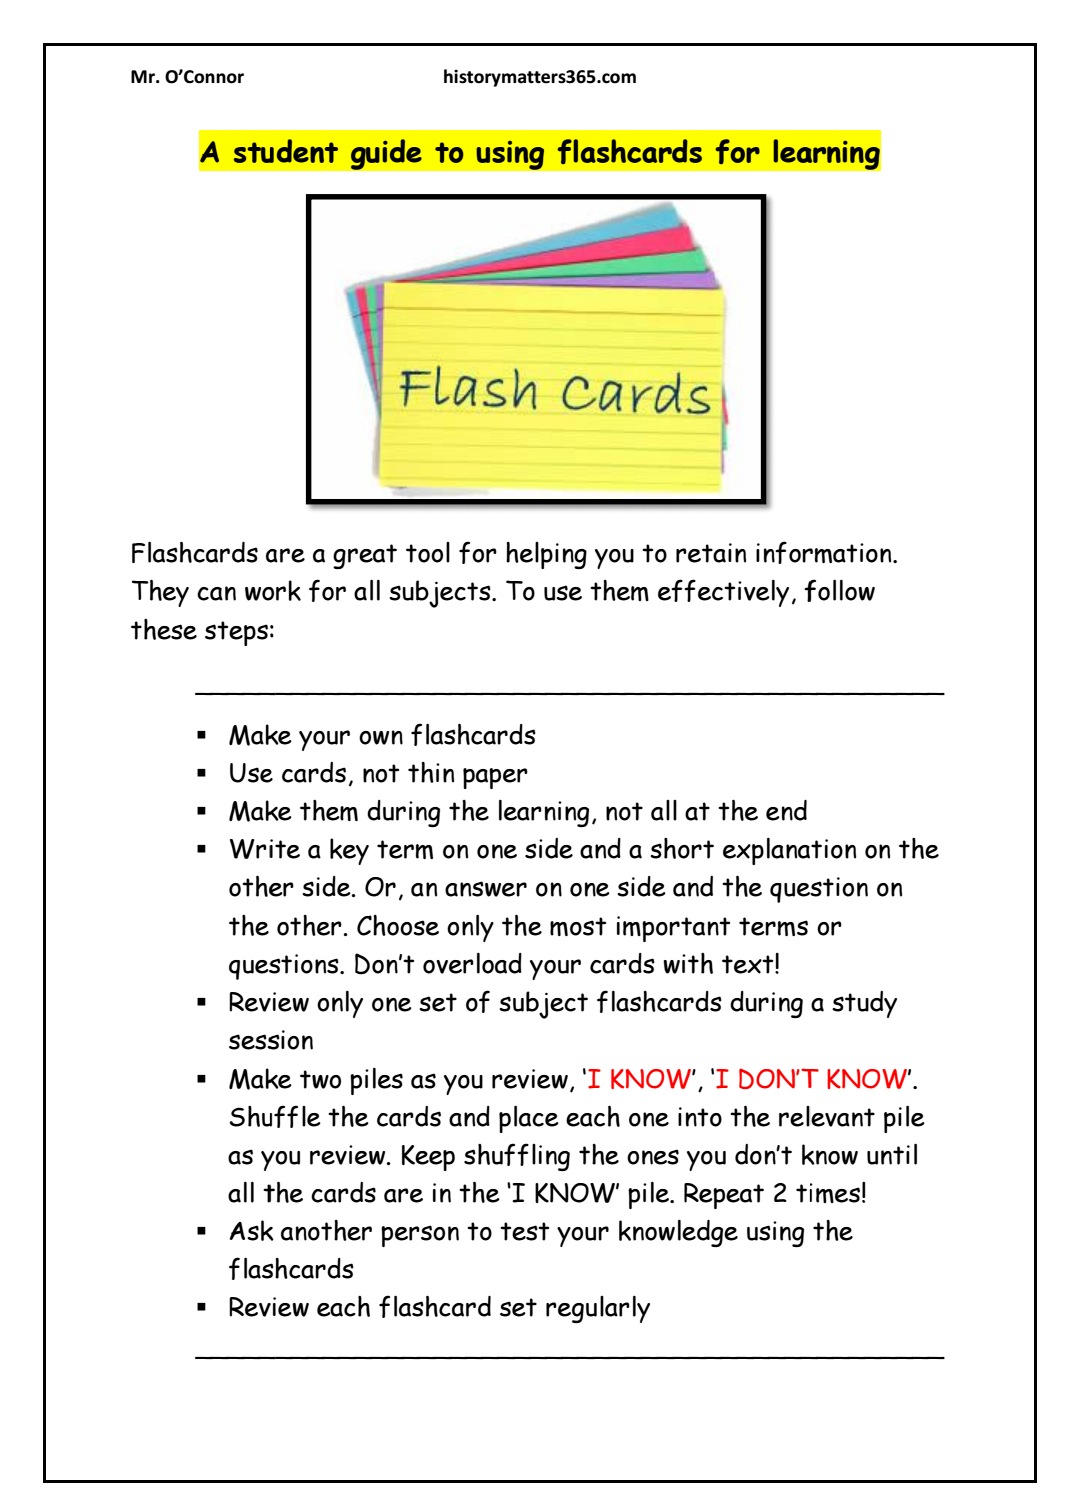
Download and print guide:
0 Comments
Exit slips help students reflect on what, and how they learn. A few minutes before the lesson concludes, the teacher gives the students a verbal prompt. Examples:
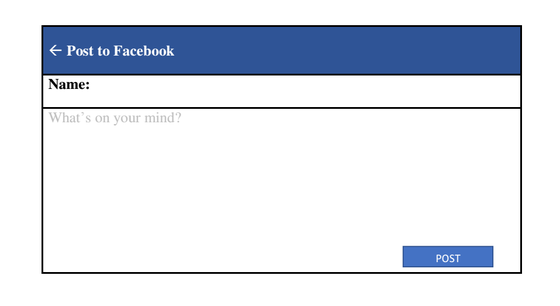
Below is a Facebook status exit slip. These are distributed. Students follow the prompt and compose their thoughts. The teacher collects the exit slips and uses them to help plan the next lesson. They could be put on display and used as an aid to recap what was learned in the last lesson.
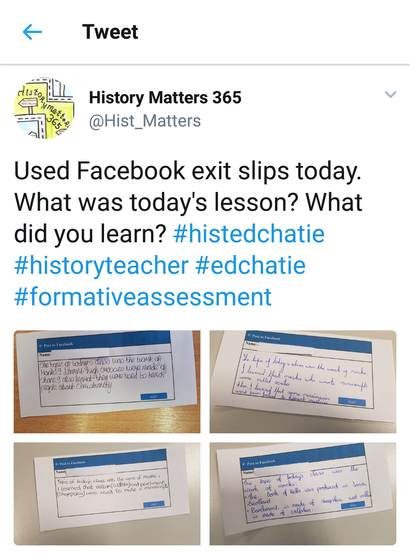
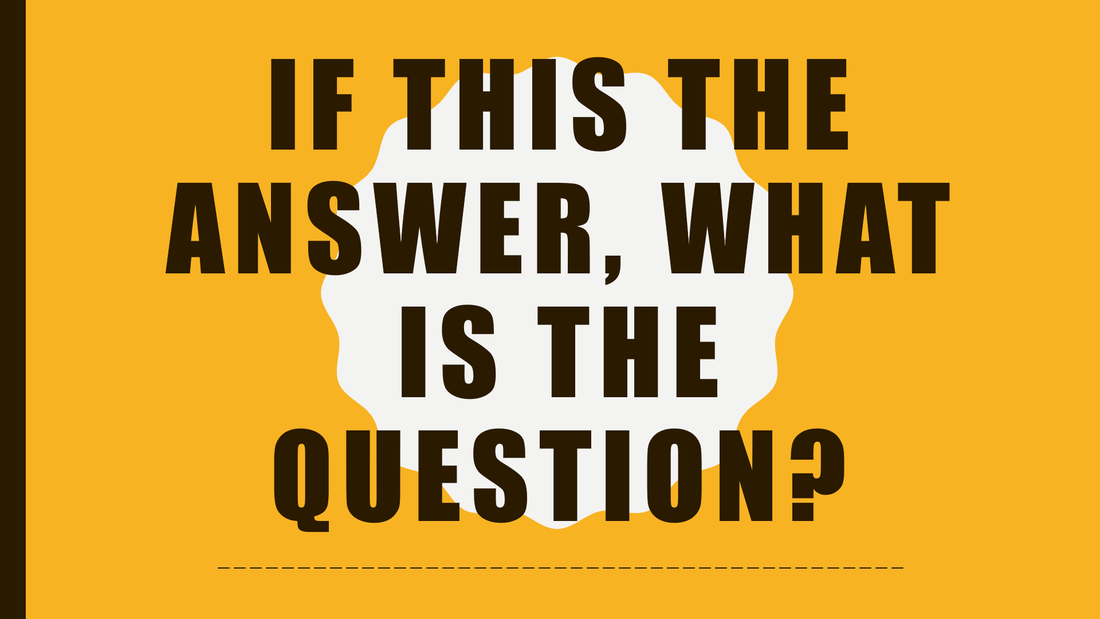
Below is a resource for planning a leaving cert history essay using topic sentence. A topic sentence indicates the theme of a main body paragraph. The main themes of the essay should be signposted in the introduction. Usually, it is the first sentence of a paragraph, but not always. For example, it could be the last sentence of the previous paragraph. One topic sentence can be used for 1 or 2 main body paragraphs. Having considered the question, draft a set of topic sentences. The essay should contain between 4 and 6 topic sentences. For each topic sentence, list approximately 4 key terms to be used in the development. The conclusion can briefly summarise the main points of the essay. However, in order to go beyond summary marks [4], you must do more. I advise asking a question that will illicit an independent thought drawn from the facts in the essay. Once the plan is complete, begin writing your essay using information from your textbook, notes and online resources. For more tips on leaving cert history essay writing, refer to this target sheet.
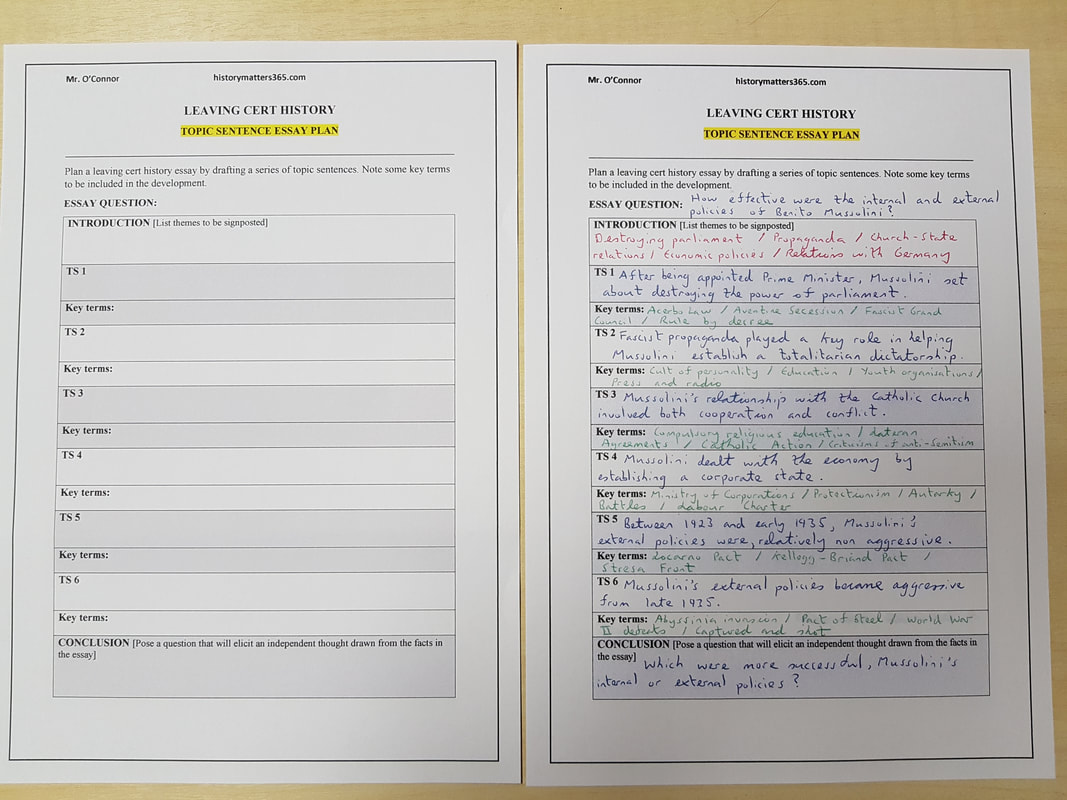
Compose a Tweet is a plenary activity. Students tweet about the learning using 140 or 280 characters e.g. a new fact from today's class you found interesting. They add a suitable hashtag at the end which links to the learning. Two printable templates below. One for 140 characters, and a second for 280 characters.
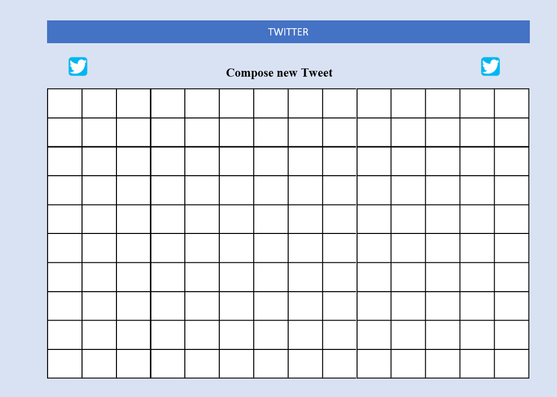
 140 characters
280 characters
Match-up exercises are a simple and effective way to check that students understand the meaning of key terms. They are especially useful for learning history. Teacher created match-ups are good, student created match-ups are better. Below is a blank template that can be printed, copied and given to students. Students work in pairs. The student selects 6-8 of the most important key terms from the learning. The student then constructs an explanation for each. Once the match-up is ready, it is given to his/her partner to complete. The student will assess the work and give feedback. The teacher should interact with the pairs as they work, giving advice, answering questions and noting how well the students are matching key terms with explanations. Are there key terms that are proving difficult? Once the pairs are finished working, the teacher should take whole class feedback. Note chosen key terms on the board in the form of a word cloud. Students share any key terms they were/are unsure of. The teacher circles these for emphasis, and for further discussion. Use the word cloud to elicit verbal explanations from individual students. Once the students are happy that they can explain each of the key terms, the class moves on with the learning.
4 Key Facts |
|||||||||||||||||||||||||||||||||||||||||||||||||||||||
| 4-3-2-1_key_reflection.pdf | |
| File Size: | 176 kb |
| File Type: | |
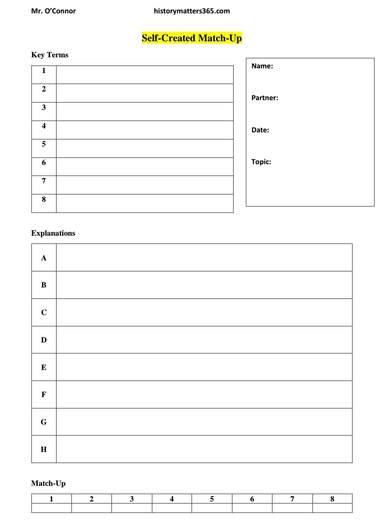
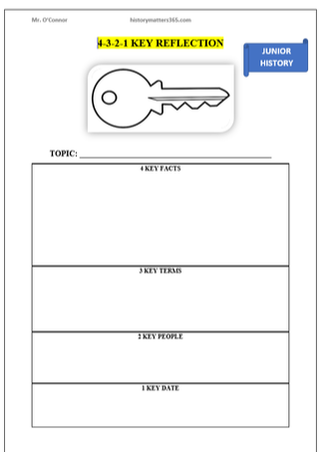
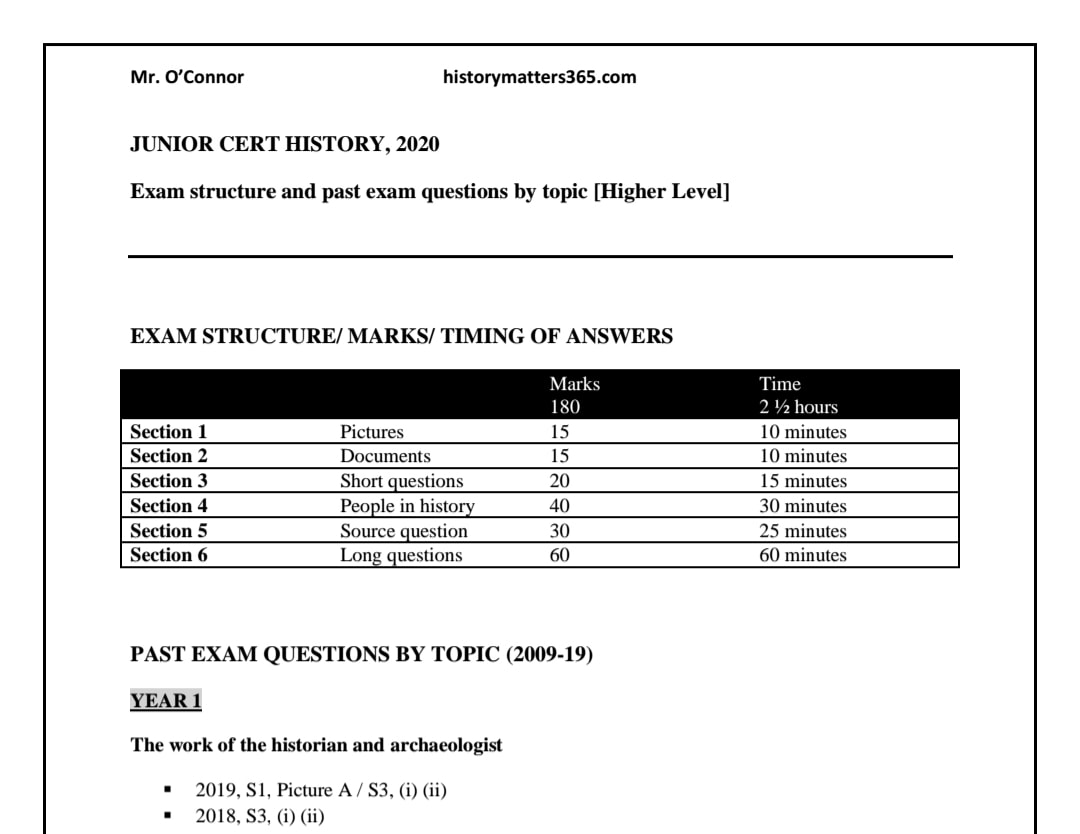
Below is a very useful Junior Cert History exam resource [Higher Level]. It should be used with past exam papers. It includes:
- Exam structure table showing:
- Marks available for each section
- How much time a student should spend on each section
- Past exam questions by topic [2009-19]
| jchist_exam_structure_and_past_exam_questions_by_topic.pdf | |
| File Size: | 141 kb |
| File Type: | |
Irish Examiner, May 10th 2017- Junior cycle history format ‘will turn students off’
Read here: junior cycle history draft specification
Cork HTA: Junior Cycle History as core. Misconceptions arising from replies by Senators and TDs
13/3/2017
Junior Cycle History as core. Misconceptions arising from replies by Senators and TDs https://t.co/t81NVGNYql #edchatie #CorkHTA #LCHist pic.twitter.com/rzBqZVV9jc
— Cork HTA (@corkhtai) March 13, 2017
Video clips are an excellent teaching and learning resource. At the fore of their use for education is YouTube. There are a few golden rules that should be followed in order to ensure video clips, YouTube or otherwise, are used effectively.
Learning should not be passive! Don't just press play and expect students to learn. Video clips should always be watched with purpose. I suggest preparing a worksheet with questions and a follow-up exercise to go with the video clip.
Select material with caution. Don't play a video clip in class without first viewing it yourself.
Short clips are best! Anything more than 10 minutes, and students begin to tune out. In my experience, clips of between 5 and 10 minutes are ideal.
Introduce an inquiry question to start; one overarching question that the class will discuss having watched the clip and completed the worksheet. This approach is especially useful for teaching History. E.g. What was the impact of the Third Home Rule Bill?
Use pause function. Pause the clip at opportune times and gather question responses or give students a chance to write a long answer on the worksheet. Take feedback. This ensures students are live to the clip. It also tells you if they are learning effectively during the viewing part of the lesson.
Assign a follow-up exercise. They can use what they have learned from the video clip but they will also need to investigate a new source. For example, a match-up exercise where students must now also research the relevant section of the textbook.
Having completed the worksheet, including the follow-up exercise, return to the inquiry question. Discuss! If the learning has been effective, students should be able to discuss the inquiry question more confidently than at the start.
Always have a back up plan. We've all been there. You have the perfect video clip and a super worksheet with a follow-up exercise. You're all set, only for the projector to break down or the internet to disconnect. Expect the unexpected.
Don't overuse video clips in class. The more you use them the less effective they become. Vary your teaching and learning methods!
Below are two useful resources. The first is a YouTube based lesson for junior students on the Impact of the Third Home Bill. The clip and the accompanying worksheet are used by students to investigate an inquiry question. There is also a follow-up exercise.
The second is a blank video clip question worksheet. I use this resource with my junior classes. A busy teacher does not always have time to make an individual video clip worksheet from scratch. This resource can be used when time is limited. Hand write questions onto the sheet and photocopy as appropriate. Assign your follow-up exercise separately.
YouTube based lesson
Inquiry Question: What was the impact of the Third Home Rule Bill?
| student_worksheet_-_the_home_rule_crisis.pdf | |
| File Size: | 281 kb |
| File Type: | |
Video clip question worksheet
| video_clip_question_worksheet.pdf | |
| File Size: | 106 kb |
| File Type: | |
History Matters 365 Blog
Author
Christian O'Connor, history teacher, St. Mary's Secondary School, Mallow, Co. Cork.
Categories
All
Chronicles
Curriculum Reform
Educational Technology
General Interest
History Teaching Strategies
Junior Cert Resources [OLD]
Junior Cycle Resources
Leaving Cert Resources
Promoting History